ラジエターエアプラグ冷却水漏れ
スバルインプレッサのディラーで事前見積もり点検を受けた時に、ラジエターエアプラグ冷却水漏れがあるとの指摘がありました。
交換する部品は、Oリング(購入価格220円)1個のみだけですが、色々な部品を外さないといけないため、技術料は1万5400円とかなり掛かります。
ラジエーター冷却液の漏れ
2020年12月22日 oemdtcより(subaru.oemdtc.com)
概要
この速報では、ラジエーター上部にあるエアプラグから漏れていると確認された軽度の冷却液漏れを修理する際に従うべき改訂されたサービス手順を示します。
This bulletin provides a revised service procedure to follow when repairing minor coolant seepage identified to be coming from the air plug at the top of the radiator.エアプラグが十分に締め付けられていないと、プラグのOリングが適切に装着されずに圧縮され、寒い季節に冷却液漏れが発生する可能性があります。
修理手順には、Oリングを交換し、エアプラグを新しいトルク仕様の2Nm(18インチポンド)に締めるまでの内容が記載されています。
If the air plug is not sufficiently tightened, the O-ring on the plug may not seat properly and compress, resulting in coolant seepage in cold weather. The repair involves replacing the O-ring and tightening the air plug to the new torque specification of 2 Nm (18 inch-pounds).部品情報
部品番号 : 45128KA000
手順
1.車両を持ち上げ、エンジンのアンダーカバーを取り外します。
Raise the vehicle and remove the engine undercover.
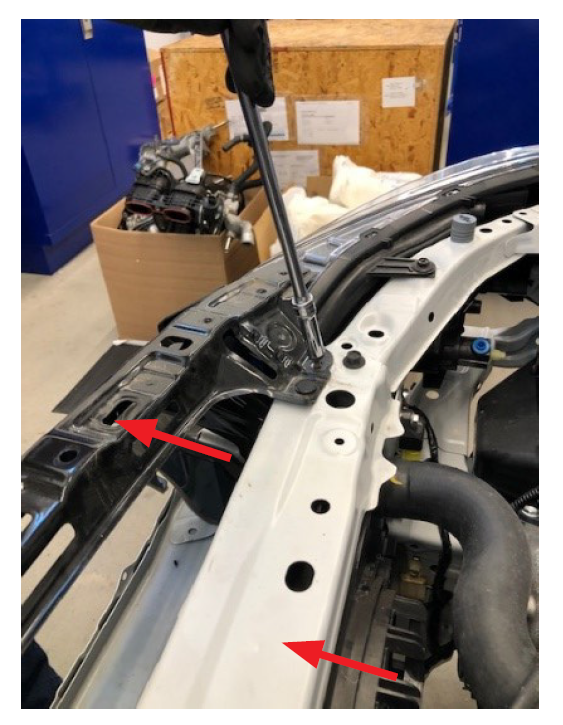
2.ラジエーター上部フレーム(a)の下部のボルト2本を取り外します。
図のように、フードラッチセンサーコネクタを外し、ハーネスクリップ(b)をフレームから取り外します。
Remove the 2 lower bolts of the radiator upper frame (a). Disconnect the hood latch sensor connector and remove harness clip (b) from the frame as shown.
3.車両を下げて、リザーバーへのオーバーフローホースを「T」接続部(c)から外し、リザーバーから取り外します。
オーバーフローホースは、後の手順でラジエーターのペットコックから約2クォートの冷却液を排出するために使用されます。
Lower the vehicle and disconnect the overflow hose to the reservoir from the “T” connection (c) and remove it from the reservoir. The overflow hose will be used to drain approximately 2 quarts of coolant from the radiator petcock in a later step.
Remove the air intake duct leading to the air filter housing.
5.上部カバーを取り外します。
Remove the upper cover.
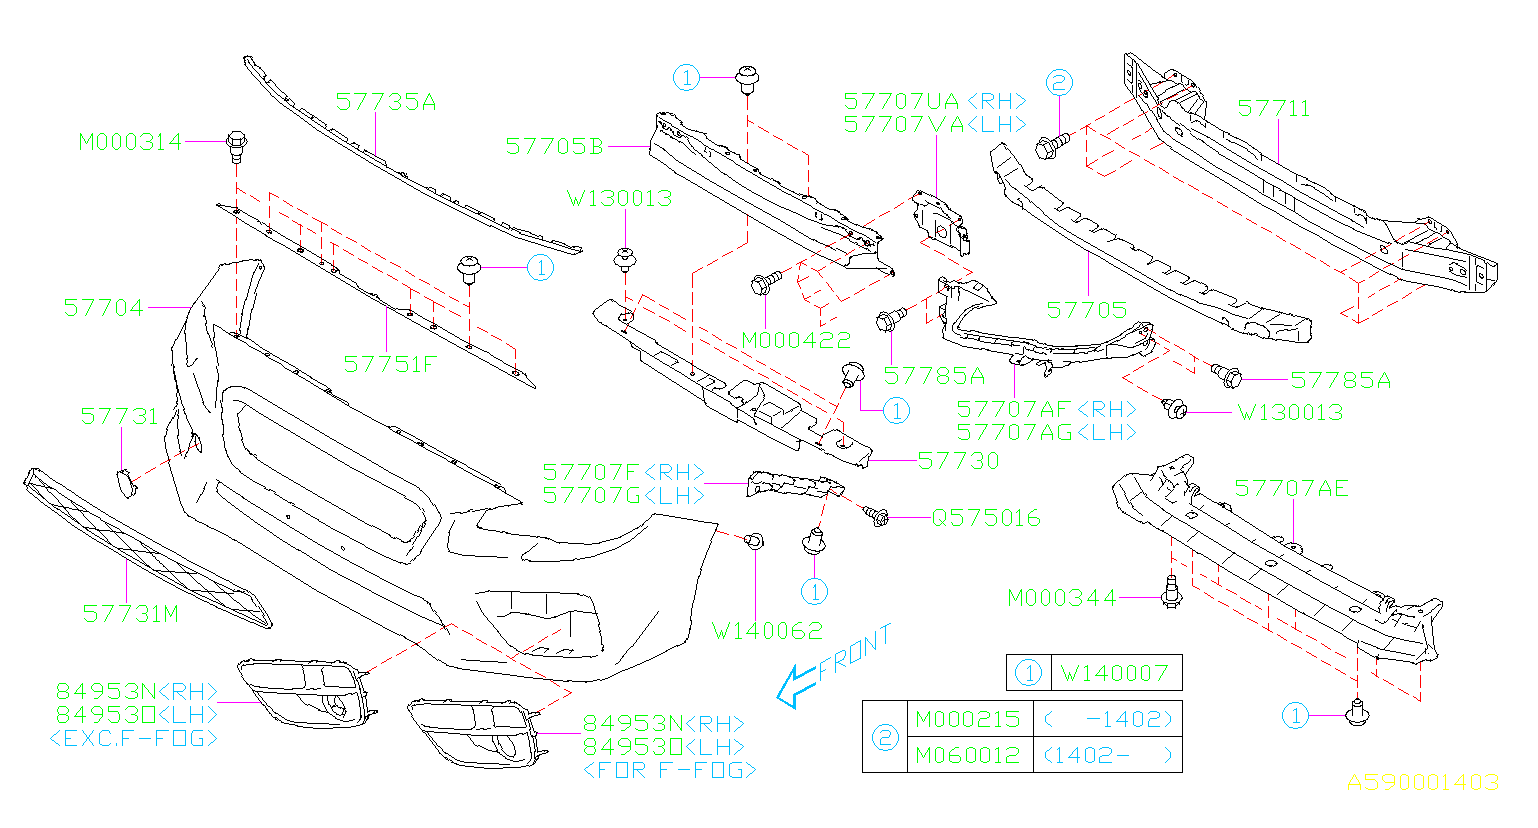
6.関連するスプラッシュシールド、上部と下部のバンパークリップ、および6つの上部固定ブラケットボルトの保持クリップをすべて取り外します。
バンパーカバーをヘッドライトの下の取り付けブラケットに固定している爪を慎重に外して、バンパーカバー(フェイシア)を取り外します
注:損傷の可能性を減らすために、この手順と再取付中にヘルパーを使用することを強くお勧めします。
注意: バンパーカバーアセンブリを取り外している間は、保持タブは非常に壊れやすいため、灰色の発泡スチロールバンパークッションに寄りかかったり、体重をかけたりしないでください。
Remove all the retaining clips for the related splash shields, upper & lower bumper clips, and the 6 top retaining bracket bolts. CAREFULLY disengage the claws securing the bumper cover to the mounting brackets under the headlights to release and remove the bumper cover (fascia) NOTE: To reduce the chances of damage, it is STRONGLY RECOMMENDED to use a helper for this step and again during reinstallation. CAUTION: While the bumper cover assembly is removed, do not lean on or put any weight against the gray Styrofoam bumper cushion as its retaining tabs are very fragile.
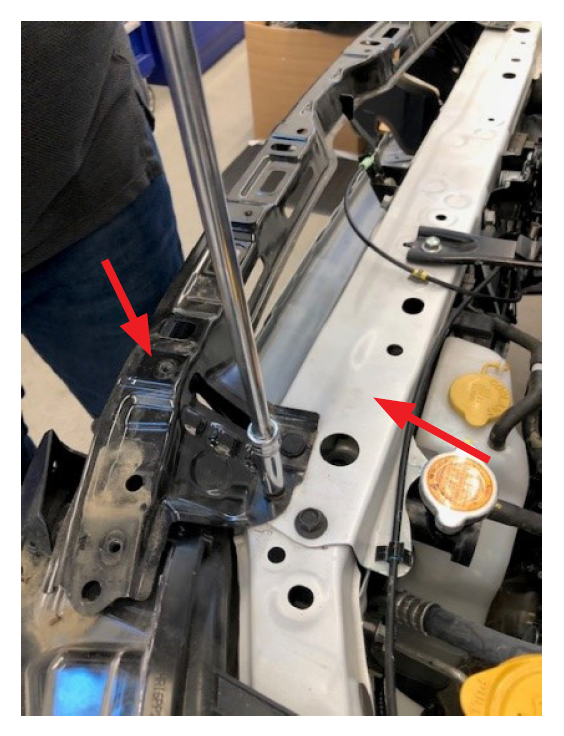
7.フードラッチケーブル(d)を上部ラジエーターフレームから外し、ラッチアセンブリ(下部の3本のボルトと固定クリップ)をラジエーター上部フレームから取り外し、図(e)のようにエンジンにセットします。
Release the hood latch cable (d) from the upper radiator frame then remove the latch assembly (3 bolts and a retaining clip at the bottom) from the radiator upper frame and set on the engine as shown (e).
8.上部バンパーカバー固定ブラケットとラジエーター上部フレームを取り外して、エアコンコンデンサーとラジエーターアセンブリにアクセスします。
Remove the upper bumper cover retaining bracket and radiator upper frame to access the a/c condenser and radiator assembly.
9.取り外したクーラントオーバーフローホースをラジエータードレンペットコック(f)に差し込み、約2クォート(約1.9リットル)の冷却液を容器に排出します。
Slide the removed coolant overflow hose to the radiator drain petcock (f) and drain approximately 2 quarts of coolant into a pan.
10.マイナスドライバーを使用して、A / Cコンデンサーをラジエーターから前方および上方に外すため、必要な量だけ慎重にこじって、分離します。
保持クリップが再びロックされない程度にコンデンサーを持ち上げてから、反対側を解放します。
両側が解放されたら、コンデンサーをラジエーターから外すのに十分な高さまでまっすぐに持ち上げ、バンパービームに置きます。
Using a flat-blade screwdriver, CAREFULLY twist ONLY AS MUCH AS NEEDED to release and separate the A/C condenser forward and upward from the radiator. Raise the condenser enough to keep the retaining clip from re-locking then release the opposite side. Once both sides are released, raise the condenser straight up enough to free it from the radiator then rest it on bumper beam.
11.ラジエーターを真上に持ち上げて下部グロメットから外し、ラジエーターの右側(助手席側)を約1インチ持ち上げてエアプラグにアクセスできる程度にします。
#2プラスドライバーを使用してエアプラグを取り外します。
Lift the radiator STRAIGHT UP only enough to free it from the lower grommets then raise the right (passenger side) of the radiator up APPROXIMATELY 1 INCH which is enough to access the air plug. Remove the air plug using a #2 Phillips screwdriver.
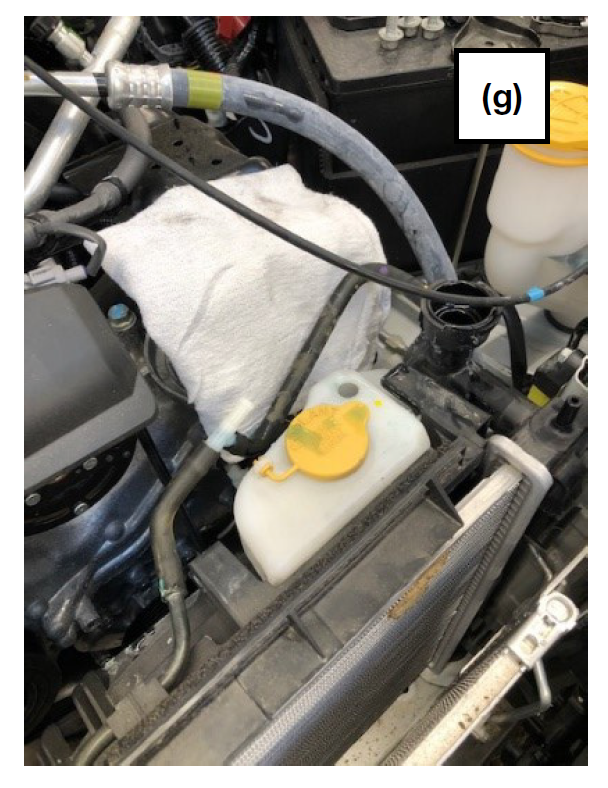
IMPORTANT: Fold up a clean shop cloth and insert it between the oil filter / housing and the back of the reservoir tank (g) to act as a protective cushion as shown below.
12.新しいOリングにクーラントを塗り、エアプラグに取り付けてから、エアプラグを再度取り付けます。
エアプラグを2Nm(18インチポンド)のトルクで締めます。締めすぎないよう注意します。
Lubricate the new o-ring with coolant and install it on the air plug then reinstall the air plug.
Torque the air plug to 2 Nm (18 inch-pounds). DO NOT over tighten!13.該当するサービスマニュアルの手順に従って、分解の逆の順序で車両を再組み立てします。
追記: フロントタイヤの前方にある下部(水平)スプラッシュガードを再度取り付けるときは、クリップの取り付けポイントを除く前端(フラップ)(b)がバンパー面(a)の内側(上)にあることを確認します。
Re assemble the vehicle in reverse order of disassembly following the procedures in the applicable Service Manual.TIP: When reinstalling the lower (horizontal) splash guards located ahead of the front tires, make sure the front edge (flap) (b), except for the clip attachment point, is inside (above) the bumper face (a).
14.新しいクーラントを補充し、該当するサービスマニュアルの手順に従って閉じ込められた空気を抜きます。
以下に示すように、補充漏斗または真空(エアリフト)補充システムを使用してください。
こぼれたクーラントは、すぐに清潔なウエスで清掃してください。
Refill with new coolant and bleed any trapped air following the procedure in the applicable Service Manual. Use the refilling funnel or a vacuum (air lift) refilling system as shown below. Always be sure to clean up any spilled coolant with a clean shop cloth.
15.車両を路上テストし、冷却ファンが適切に動作していることを確認して、手順を完了します。
Road test the vehicle and confirm proper cooling fan operation to complete the procedure.


